Garden Sustainability: Backyard Composting in 8 Steps
Backyard composting is not just a waste management solution, it’s a way to nurture your garden and contribute to a healthier planet. Composting happens naturally on forest floors and with these eight simple steps, it can happen in your own backyard.
In this Article:
- What is Composting
- Benefits to your Soil
- When to start a compost pile
- The Backyard Composting Bin
- Traditional (DIY)
- Modern
- Indoor
- Composting Materials: What’s Good, What’s Bad
- Green Materials
- Brown Materials
- What Not to Include
- Worms in Composting
- How Long Does Composting Take?
- 8 Steps to Successful Backyard Composting
- Choose your location
- Pick a compost bin
- Kitchen composter
- Add material
- Watch your pile
- Turn and turn again
- Patience
- Take its temp
- Environmental Impact of Backyard Composting
This article contains affiliate links to products for your convenience. Vertical Gardens Hub may earn a small commission from purchases made through these links at no additional cost to you. Please see our disclaimer to learn more.
What is Composting
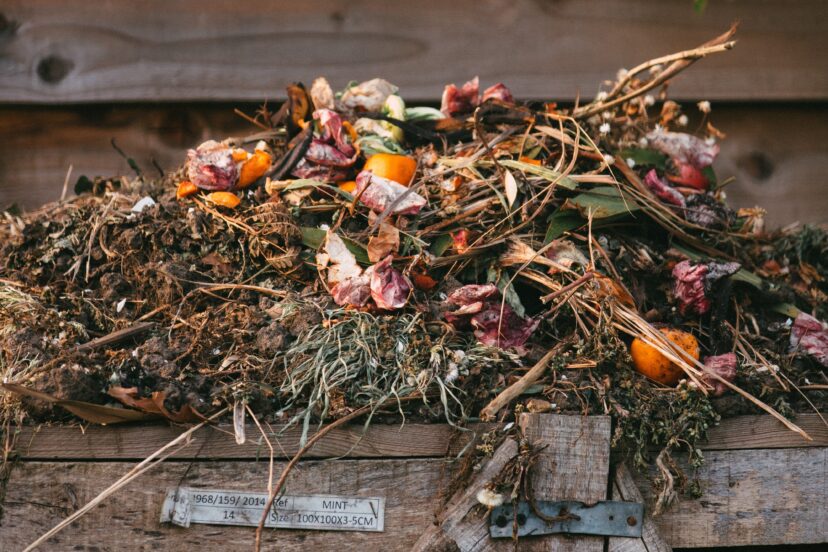
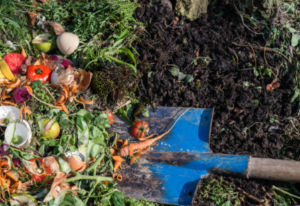 Composting is nature’s way of recycling—it’s the microbial process that breaks down and transforms waste into nutrient-rich “black gold” for your soil, plants, and the environment. Tons of kitchen scraps and garden waste enter our landfills each year when they belong in compost bins. By transforming eggshells, leaves, orange rinds, grass clippings and more into compost, you can see what healthy soil really is. Composting is much easier than it seems and doesn’t take a large amount of time or space, just a bit of patience. And best of all, it’s free!
Benefits to your Soil
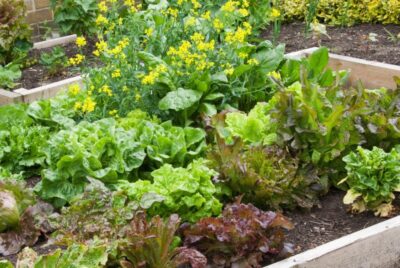
Adding compost to your soil increases the content of organic matter, which improves its texture, drainage, and fertility. All these things lead to happier, healthier, bigger, and more productive plants!
- Compost invigorates the soil by providing nutrients, moisture, and habitat for beneficial life forms and healthy soil is full of good bacteria, fungi, nematodes, insects, and more.
- By nourishing both the soil and plants, compost cleanses the soil by removing toxins. Plants grown with compost have a higher resistance to disease or stress, such as drought, pests, or weather extremes.
- Correctly composting provides benefits with no shock to plants, which can be common when using chemical fertilizers.
When to Start a Compost Pile
Composting can be started anytime, but better when there is plenty of waste available. Composting needs both brown and green matter to properly break down and there isn’t one season you need to adhere to. Fall is the good time with more brown matter like dead leaves, hay or twigs available. Spring is a close second with green materials like grass clippings, and kitchen scraps. A good starting point is when you want to start. Make sure your brown and green matter ratio is at about a 1:2 ratio or 1-part brown matter to 2-parts green matter when starting out.
The Backyard Composting Bin
One key to successful composting lies in selecting the right bin. There are various options available, from traditional compost heaps to modern composting tumblers and they cater to different needs, spaces, and preferences. Choosing the right composting bin depends on your space, lifestyle, and composting goals.
Whether you opt for the simplicity of a traditional heap, the efficiency of a tumbler, or the controlled environment of a worm composting bin, each type does have its unique advantages.
Traditional (DIY)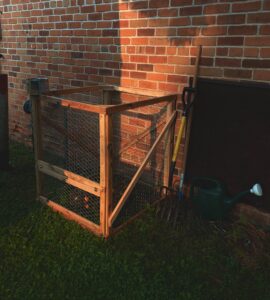
- Traditional Compost Heap: A simple and cost-effective option, a traditional compost heap is an open pile placed directly on the ground. It allows for ample aeration and is suitable for larger outdoor spaces.
- Pros: Easy and inexpensive, provides natural aeration
- Cons: May attract pests, challenging to control temperature and moisture
- DIY Pallet Compost Bin: Utilizing wooden pallets to create a simple and cost-effective compost bin. It provides a contained space for composting.
- Pros: Low cost, customizable, allows for natural aeration.
- Cons: Requires assembly, may have limited aesthetic appeal.
- Stationary Three-Bin System: Comprising three adjacent bins, this system allows for a continuous composting process. Materials move from one bin to the next as they decompose.
- Pros: Enables a constant supply of compost, organized and straightforward.
- Cons: Takes up more space than a single bin, requires manual turning.
Modern
- Compost Tumbler: A cylindrical bin mounted on a frame that allows for easy turning or rotating of the compost. Tumblers expedite the composting process by enhancing aeration and mixing. (Recommend the FCMP Outdoor Dual Chamber Tumbling Composter)
- Pros: Quick and efficient composting, reduced odor, easy turning
- Cons: Costlier than traditional heaps, limited capacity
- Compost Bin with Aeration Vents: These bins feature aeration vents or holes to facilitate airflow and optimize the decomposition process. They come in various sizes and materials. (Recommend the F2C Garden Compost Aerating Bin)
- Pros: Improved aeration, better control over compost conditions.
- Cons: May still require occasional turning, some models are limited in capacity.
- Worm Composting Bin (Vermicomposter): Specifically designed for vermicomposting, these bins house composting worms (such as red wigglers) that break down organic matter into nutrient-rich castings. (Recommend the VermiHut 5-Tray Worm Compost Bin)
- Pros: Efficient for kitchen waste, suitable for indoor use, produces high-quality worm castings.
- Cons: Requires a supply of composting worms, may have a smaller capacity.
- In-Ground Composting System: An in-ground composting system involves burying compostable materials directly in the soil. This method enhances microbial activity and nutrient absorption by plants.
- Pros: Integrates composting with the garden, minimal setup cost.
- Cons: Limited to certain climates, may attract digging animals.
- Rolling Compost Bin: A compost bin on wheels that allows for easy movement and repositioning. Rolling bins often feature ventilation and drainage systems. (Recommend the FCMP Outdoor HOTFROG Mobile Composter with Wheels)
- Pros: Convenient for mobility, easy turning, compact design.
- Cons: Limited capacity – may require more frequent turning.
Indoor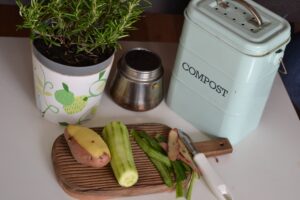
- Kitchen Indoor Composter: Compact bins designed for indoor use, often with airtight lids and carbon filters to control odors. Ideal for collecting kitchen scraps for vermicomposting or outdoor composting. ( Recommend the Epica 1.3 Gal Countertop Compost Bin)
- Pros: Fits in small spaces, convenient for daily kitchen waste.
- Cons: Requires additional outdoor composting space or vermicomposting setup.
Composting Materials: What’s Good, What’s Bad
Not all composting materials are created equal. There are brown and green materials that make up the perfect compost recipe (1:2 ratio, respectively), as well as items you should stay clear of to maintain a healthy composting environment. Understanding what to compost and what not to is crucial for maintaining a healthy and effective composting process.
Green Materials: What to Include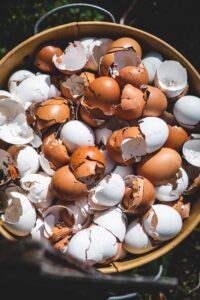
- Fruit and Vegetable Scraps: Kitchen scraps like peels, cores, and leftovers are rich in nitrogen, a key component for a balanced compost pile.
- Coffee Grounds: Used coffee grounds add nitrogen to your compost, and they can help in maintaining the right moisture levels.
- Grass Clippings: Nitrogen-rich grass clippings are excellent green materials. However, avoid using clippings treated with pesticides.
- Green Leaves: Fresh leaves, especially from plants without diseases, contribute valuable nutrients to your compost.
- Weeds (without seeds): Weeds pulled before they go to seed can be added but avoid those with mature seeds to prevent unwanted plant growth.
- Eggshells: Crushed eggshells provide calcium, balancing the pH of your compost and aiding in decomposition.
Brown Materials: What to Include
- Dry Leaves: Brown leaves, shredded or whole, are a fantastic source of carbon and help create the right balance in your compost.
- Straw or Hay: These materials add bulk to the compost pile, allowing for better aeration, and contribute carbon.
- Newspaper and Cardboard: Shredded newspaper or cardboard provides carbon and helps maintain moisture levels. Avoid glossy or colored paper.
- Wood Chips or Sawdust: Small amounts of untreated wood chips or sawdust can be added for carbon content.
- Twigs and Small Branches: Chopped into smaller pieces, these contribute to the structure of the compost pile.
What Not to Include in Your Compost Bin
- Meat and Dairy Products: These items can attract pests and create unpleasant odors. Avoid adding them to your compost.
- Oily or Greasy Foods: These can slow down the composting process and may lead to a smelly compost bin.
- Pet Waste: Pet feces can contain harmful pathogens, and it’s best to avoid adding them to your compost to prevent contamination.
- Diseased Plants: Plants infected with diseases may survive the composting process, spreading the illness when used in the garden.
- Coal or Charcoal Ash: The ash from coal or charcoal can contain substances harmful to plants. Wood ash, in moderation, is acceptable.
- Plastics and Synthetic Materials: Never include plastics, synthetic fabrics, or non-biodegradable materials in your compost. These can harm the environment and contaminate your compost.
Also Read:
8 Steps to Successful Backyard Composting
Let’s roll up our sleeves and get into the nitty-gritty of composting. From setting up your bin to layering and turning the compost pile, composting is simple, and most people never have done it.
- Choose your location: You’ll need to find a patch of grass or dirt for your pile or bin. Make sure a hose can reach it, in a spot that is somewhat shady, and not to far from your kitchen.
- Pick a compost bin. This is optional, but there are advantages to using a bin over a big pile of compost waste. Aesthetics is one and you’ll get faster results using a bin where moisture and warmth can be controlled. Ease of use is another, especially if you get a tumbling compost bin.
- Kitchen composter: A simple plastic container and lid will do, but there are advantages to getting a quality container that has air holes and deodorizing filters to keep the scent down.
- Add material: Once the above steps are completed chop the waste into smaller pieces and start tossing it in – smaller piece decompose more quickly than larger ones.
- It’s recommended to add a couple of shovelfuls of fresh, moist dirt from your garden to start the microbial activity.
- Layering green and brown waste is also recommended but not necessary.
- Watch your pile: Make sure the pile doesn’t get to dry or wet. Add additional green waste or water to moisten or more brown waste to soak up the extra moisture. It should feel like a wrung-out sponge, not a soaking wet one.
- Turn and turn again: Every couple of weeks your compost pile needs to be mixed to combine the newer vs older waste. It helps aerate the mix to stimulate the soil microbes for faster composting and keeping it smelling fresh.
- Patience: The hardest part of composting is the wait. You’ll need some patience when it comes to composting. The soil microbes will do their part and make your compost an excellent fertilizer for your garden.
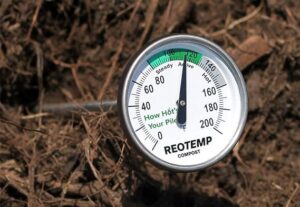 Take its temp: Compost piles heat up when feeding on waste. The best temperature range is between 110- and 145-degrees F. It’s hot enough to kill disease organisms that have entered your pile, but a pile that’s too hot can kill the microbes and slowing down decomposition. Make sure your getting into the middle of the pile to get the most accurate reading. This Reotemp 20″ Composting Thermometer is a best buy in our books.
Worms in Backyard Composting
In nature, composting happens with and without the help of worms – they most likely will find their own way into your compost pile. Worms are not something you need to add, however, these little creatures can play a role in breaking down organic matter, speeding up the composting process (Vermicomposting) and enhancing the quality of your compost. If you’d like to add worms, see your local garden store on where to purchase worms for your area.
How Long Does Composting Take?
 Understanding the composition of your compost pile plays a role in determining how long it takes for the materials to break down into soil. With the right balance of materials, regular turning, and proper aeration, you can expect a fertile compost within a few months to a year. Compost is ready when all materials have decomposed into small dark brown soil like substance, it crumbles, and smells earthy. Gardeners call this “Black Gold”
Environmental Impact of Backyard Composting
According to the EPA, backyard composting contributes significantly to the reduction of household waste and lowers your carbon footprint. Composting can influence the larger environmental landscape by reducing greenhouse gas emissions, recycling nutrients, and mitigating the impacts of drought.
Composting enriches and builds healthy soil by:
- Increasing the nutrient content and biodiversity of microbes in soil
- Conserves and reduces water use by helping soil retain moisture
- Prevents soil erosion by reducing soil compaction and runoff
- Reduces the need for chemical fertilizers and pesticides
- Improves plant growth and higher yields of agricultural crops
- Regenerates poor soils and cleans up soils that have been depleted by overuse
Final Thoughts
In conclusion, backyard composting is not just a method of waste disposal; it’s a lifestyle that benefits both you and the environment. By implementing these steps, you’ll be on your way to turning your waste into gold and making a positive impact on the planet.
FAQs
Q: How do I deal with a smelly compost bin? A: Addressing common issues like unpleasant odors involves adjusting the balance of green and brown materials. Proper aeration and turning of the compost pile can also mitigate odors.
Q: Can I compost pet waste? A: While it’s possible, it’s not recommended due to potential pathogens. Consider dedicated pet waste composting systems if you choose to do so.
Q: Are there specific rules for composting in colder climates? A: Cold climates pose challenges, but insulating your compost bin and choosing cold-tolerant composting materials can help maintain an effective composting process.
Q: What if I don’t have access to worms for composting? A: Worms are beneficial but not mandatory for composting. You can still achieve excellent results using a worm-free composting method.
Q: How can I speed up the composting process? A: Turning the compost regularly, maintaining the right balance of materials, and ensuring proper aeration are key factors in accelerating the composting timeline.

